Guides
From seed lot to hardened transplant: propagating cut flowers step by step
Cut flower propagation guide: sow zinnias at 70–75°F, snapdragons at 65–70°F, harden 7–14 days, and track lots from seed to field-ready transplant.
What to take away
- Choose propagation method crop by cropzinnias, cosmos, and celosia come true from seed; dahlias multiply by tubers; snapdragons and lisianthus need precise root-zone temperature.
- Schedule backward from the safe planting window. A zinnia lot needs roughly 4–6 weeks under lights before a frost-free field date; lisianthus needs 12–16 weeks.
- Control root-zone temperature and moisture for germination (70–75°F for zinnias and cosmos; 65–70°F for snapdragons and lisianthus), then give seedlings 14–16 hours of light at 2–4 inches above the canopy.
- Keep lots separate and record germination percentage, losses, potting dates, and field survival.
- Treat nursery bench space, labor, and hardening area as limited production capacity; a 72-cell tray holds 72 plants and a 200-cell tray holds 200.
This cut flower propagation guide converts seed, cuttings, crowns, bulbs, or divided plants into a uniform field stand. For a cut flower grower, success is not the number of green shoots on a bench. It is the number of correctly labeled, sturdy plants ready on the field date, followed by their survival and useful harvest. Zinnias, cosmos, snapdragons, lisianthus, celosia, sunflowers, dahlias, gladiolus, and ranunculus each demand a different route and timetable.
That broader definition changes the plan. Starting very early can produce oversized, root-bound plants. Filling every shelf can make watering and scouting inconsistent. A cheap seed lot can become expensive when poor germination delays a planting window. A succession calendar built backward from sales weeks exposes those collisions before seed is ordered.
Choose the propagation route
Use seed when the crop comes true enough for the intended product, the seed is available, and the timetable fits. Direct sow crops that establish reliably in field conditions or resent root disturbance. Transplant crops that need a head start, precise spacing, or protection during vulnerable early growth.
Use vegetative propagation when a named cultivar must remain genetically consistent or when the species is commonly multiplied by cuttings, division, bulbs, corms, rhizomes, or tubers. Dahlias (tubers), gladiolus (corms), ranunculus (corms), peonies (division), and many stock and lisianthus cultivars (cuttings) fall here. Before propagating a protected cultivar for sale, check the USPTO Plant Patent records (35 U.S.C. § 161) and the USDA Plant Variety Protection office (7 U.S.C. § 2321 et seq.) to confirm whether a license is required.
Build the schedule backward
For every lot, record the target field date, hardening start, sowing date, and crop-specific intervals. A worked example for zinnias: target field date May 20 (last frost + 1 week), hardening starts May 6 (14 days before), sowing date April 1 (5 weeks before hardening, accounting for 3–7 days to emergence and 4–5 weeks to a 2-inch transplant). For lisianthus the same May 20 field date pushes sowing back to mid-January (14–16 weeks under lights at 65–70°F, 10–21 days to emergence).
Backward Propagation Schedule
- Target field dateplanting window opens
- Hardening startgradual outdoor exposure begins
- Potting-on dateroots need larger cell
- Expected emergencerealistic germination window
- Sowing datefield date minus nursery time
- Backup decisionlatest resow or buy date
| Date | Meaning |
|---|---|
| Target field date | When soil, frost risk, and crop tolerance should permit planting |
| Hardening start | When gradual outdoor exposure begins |
| Potting-on date | When roots and leaves should justify a larger cell, if needed |
| Expected emergence | The realistic germination window |
| Sowing date | Field date minus nursery and hardening time |
| Backup decision | Latest useful date for resowing or buying replacements |
The packet's suggested weeks are a starting point. Adjust for the actual nursery temperature, light, container size, crop growth rate, and local field conditions. Zinnias at 75°F and strong light may reach transplant size in 4 weeks; the same lot at 65°F under weak light may need 6–7. Do not schedule more trays than the shelves, lights, and hardening space can carry at their peak.
Start with seed and lot information
Record crop, cultivar, supplier, lot, pack date, stated germination, treatment, and quantity. Store seed cool and dry according to crop and supplier guidance. Test older or scarce lots before depending on them for a fixed sales window.
University of New Hampshire Extension's detailed guide to starting plants from seed explains how water, oxygen, temperature, and sometimes light govern germination. It also warns that sowing too early and holding plants under poor conditions produces weak, stretched seedlings.
Match container and medium to the stage
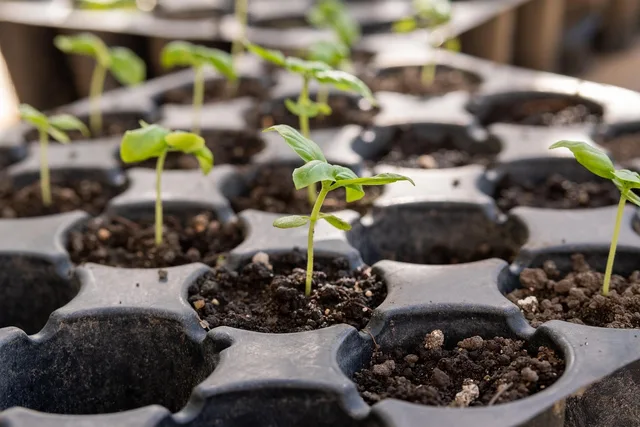
Use clean trays with drainage and a uniform, well-drained propagation medium. A standard recipe is a 50:50 blend of fine peat or coir and perlite, or a commercial mix such as Pro-Mix BX or Sunshine Mix #1, moistened to field capacity before filling. Garden soil is generally too variable and may introduce pathogens. Cell sizes range from 200-cell (≈0.4 cu in per cell, for tiny-seeded crops like snapdragons and lisianthus) through 72-cell (≈3 cu in, for zinnias, cosmos, and celosia) to 4-inch or 2-inch round pots (for sunflowers and crops that need a longer holding window). The cell must hold enough water for the germination interval without remaining saturated and must allow the root plug to hold together at transplanting.
Small vs Large Cells
Small cells
- Bench space
- saves space
- Drying
- dries quickly
- Root margin
- little margin
- Holding window
- short
- Cost
- lower medium cost
Larger cells
- Bench space
- uses more space
- Drying
- holds water longer
- Root margin
- more margin
- Holding window
- extended
- Cost
- higher medium cost
Small cells (200-cell, 128-cell) save bench space but dry quickly and give roots little margin when field planting is delayed. Larger cells (72-cell, 50-cell) or 2-inch pots cost more medium and space but can extend the holding window from 4 to 6–8 weeks. Choose from the crop, schedule, and irrigation system rather than from tray price alone.
Sow for uniform emergence
Pre-moisten the medium evenly. Fill cells without compressing them into airless blocks, level the surface, and sow at the crop's specified depth. Zinnia and cosmos seeds are sown ¼ inch deep; snapdragon and lisianthus seeds are surface-sown because they need light to germinate; celosia is barely covered at ⅛ inch. Some tiny seeds need light and should not be buried. Others need darkness or a particular pretreatment.
Label the tray before leaving it. Include crop, cultivar, lot, sowing date, and succession. A bench map supports labels but does not replace them.
Separate germination from seedling growth
The environment that speeds germination may be too warm or humid after emergence. Monitor medium temperature, not only room temperature. Target root-zone temperatures: 70–75°F for zinnias, cosmos, and celosia; 65–70°F for snapdragons and lisianthus; 65–75°F for sunflowers. Keep moisture uniform, but prevent prolonged saturation. Remove domes or coverings at the crop-appropriate time and provide air movement without drying tender cells.
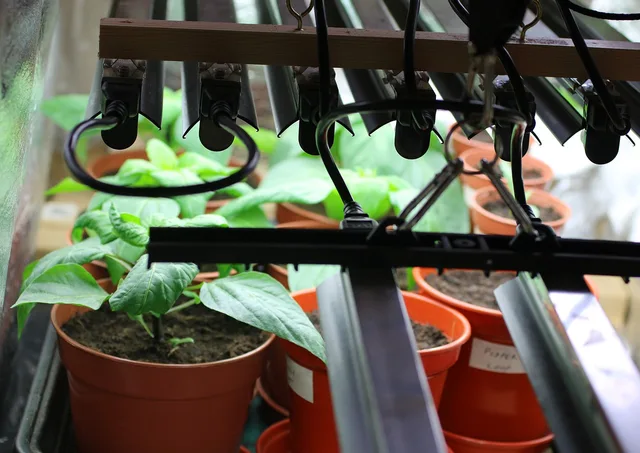
Move emerged trays into sufficient light promptly. Bright light to a person may be weak for compact seedling growth. Provide 14–16 hours of light daily from T5 fluorescent or LED fixtures positioned 2–4 inches above the canopy, raising them as plants grow. Follow a consistent daily schedule and avoid stretching from insufficient intensity.
Utah State University Extension's fact sheet on seedling culture after emergence says to remove the humidity dome once about half the seeds are up. Use brief, gentle, direct airflow to build sturdier seedlings.
Thin, pot on, and feed from evidence
Thin crowded cells by cutting unwanted seedlings rather than pulling roots through the retained plant. Pot on when the crop needs more root space and the added labor will improve field readiness. Handle seedlings by leaves where possible, not by crushing the stem.
Propagation media may contain little fertility. Begin a suitable feed after the first true leaves appear, typically 100–200 ppm nitrogen from a balanced 20-20-20 water-soluble fertilizer, applied every 2–3 irrigations. Measure concentration, pH (target 5.5–6.5 for most cut flower seedlings), and electrical conductivity (keep below 1.5 mS/cm in the leachate) where the scale and risk justify it. More feed will not correct poor light or saturated roots.
Root cuttings and divide cleanly
For cuttings, select healthy stock plants, use clean tools, preserve orientation, and prevent wilting between the stock plant and propagation medium. Match cutting type, hormone, temperature, humidity, and light to the species.
For division, ensure each section has the required crown, roots, buds, or storage structure. Dahlias need at least one eye on a tuber section; peonies need 3–5 eyes and a good root mass; bearded iris rhizomes need a fan of leaves and a firm rhizome. Discard diseased or damaged material and keep cultivars separated. A high multiplication count is useless if divisions lack viable growing points.
Harden without starving
Gradually expose transplants to stronger light, wind, temperature changes, and outdoor water demand. Avoid severe wilting or an abrupt fertilizer stop. Hardening should prepare the plant, not permanently stunt it.
At field planting, record plants set, rejects, and replacements. Count survival after 14 days, a defined interval that separates transplant shock from true establishment. Nursery germination and field establishment are different metrics and should remain separate.
Common questions
Is bottom heat required for every seed?
No. Bottom heat (70–75°F) helps warm-soil crops like zinnias, cosmos, and celosia when ambient conditions are cool, and is essential for lisianthus and snapdragons at 65–70°F. Excessive heat above 80°F can inhibit germination or dry cells. Follow crop requirements; sunflowers and most annuals germinate adequately at room temperature without a mat.
Should I sow two seeds in every cell?
Not automatically. Seed cost, expected germination, thinning labor, and crop sensitivity determine whether oversowing is economical.
Can cut flower seedlings grow on a windowsill?
Some may, but seasonal light and temperature can be uneven. A controlled light setup gives more repeatable production.
What is the best propagation success measure?
Track viable plants ready on schedule, field survival, and later marketable stems, alongside germination and rooting percentages.
In this guide
- Start Cut Flower Seeds Under Lights: Rack, Distance, HoursStart cut flower seeds under lights: Extension light distances and hours, counting trays for peak load, airflow, temperature and fixes for leggy growth.
- Propagation compared: direct seed, transplant, cutting, and division for cut flowersDirect seed, transplant, cutting, and division compared for cut flower crops by genetic consistency, timing, labor, equipment, root disturbance, cost, and scale.
- Cut flower seed starting checklist for a small nurseryCut flower seed starting checklist for a small nursery: schedules, seed lots, sanitation, medium, temperature, light, watering, thinning, hardening, and logs.
- Why do cut flower seedlings damp off, stretch, or stall?Cut flower seedling problems include poor germination, damping-off, algae, legginess, scorch, nutrient symptoms, root binding, and transplant shock.
- Cut flower propagation case study: a fictional capacity planCut flower propagation case study follows a fictional grower using tray-weeks, sowing dates, lighting, watering, and hardening to manage nursery capacity.