Maintenance
Part of From seed lot to hardened transplant: propagating cut flowers step by step
Cut flower seed starting checklist for a small nursery
Cut flower seed starting checklist for a small nursery: schedules, seed lots, sanitation, medium, temperature, light, watering, thinning, hardening, and logs.
What to take away
- Finish the tray-capacity and field-date schedule before opening seed packets.
- Label every tray with cultivar, lot, sowing date, and succession.
- Check medium temperature, moisture, and emergence at least daily.
- Give emerged seedlings enough light and room before they stretch.
- Close each lot with germination, transplant, field-survival, and harvest records.
This cut flower seed starting checklist is designed for a small nursery or indoor rack. Add crop-specific depth, temperature, light, and timing from the packet and reliable regional guidance. Do not convert general examples into one standard for every flower.
Common cut flowers started indoors include snapdragons, lisianthus, zinnias, cosmos, celosia, and dahlias. Cool-season starts and warm-season starts often share the same bench, so keep the crop name, cultivar, lot, and target field date together on every label and record.
Annual plan
- List target field dates by crop and succession.
- Check average frost dates and crop tolerance.
- Count nursery weeks, hardening time, and weather allowance backward.
- Chart total trays on each shelf for every week.
- Include space after potting on.
- Reserve room for a defined replacement batch.
- Confirm field beds, irrigation, and support will be ready.
- Set a latest useful resowing date for each crop.
University of Minnesota Extension's current indoor seed-starting overview lists drainage trays, sterile medium, steady warmth, close adjustable lights, gentle airflow, and gradual hardening among the core needs. Use local crop directions for exact settings.
Seed inventory
- Crop and cultivar.
- Supplier and lot.
- Pack or test date.
- Stated germination percentage.
- Seed treatment and handling warnings.
- Quantity available and quantity required.
- Storage condition.
- Patent or propagation restriction where relevant.
- Germination test for old, scarce, or schedule-critical seed.
For older seed, plan a counted viability check early enough to replace the lot or adjust the number sown. Keep the test separate from production trays so uncertain seed does not consume scheduled cells before its likely germination is known.
Room and equipment
- Waterproof surfaces and drainage.
- Safe electrical layout above spill level.
- Adjustable fixtures and working timer.
- Thermometer at medium level.
- Heat mats with control where required.
- Gentle air movement.
- Clean water source and measured watering tools.
- Shelf and tray identifiers.
- Space to isolate suspect trays.
- Hardening area protected from harsh first exposure.
Sanitation
- Clean trays and tools before the cycle.
- Apply a suitable sanitation protocol to reusable equipment.
- Use fresh seed-starting medium.
- Keep field soil and dirty tools out of the propagation room.
- Wash hands or gloves between diseased and healthy lots.
- Remove dead seedlings and debris promptly.
- Disinfect benches between cycles where the risk calls for it.
- Record recurring disease by shelf and tray type.
Sowing day
- Pre-moisten medium evenly.
- Fill cells consistently without hard compaction.
- Read depth, temperature, and light requirements.
- Complete any crop-specific pretreatment.
- Count cells and seed used.
- Sow at uniform depth.
- Cover or leave exposed as specified.
- Water without washing seed aside.
- Attach label and update log.
- Put the tray in its assigned germination zone.
Germination checks
- Read medium temperature.
- Inspect moisture below the surface.
- Check covered trays for overheating or excessive condensation.
- Record first emergence.
- Count emerged cells at a defined day.
- Move or uncover trays at the correct stage.
- Start the light schedule promptly.
- Flag delayed lots before the backup deadline.
- Keep ungerminated trays from occupying prime light space indefinitely.
Seedling growth
Oregon State University Extension provides a simple stored-seed viability test using counted seed and a damp paper towel so the number germinated can be converted to a percentage. The check turns an old packet into a measured planning input rather than a guess.
- Maintain correct fixture distance.
- Check canopy uniformity across each shelf.
- Rotate only after diagnosing an uneven light or airflow pattern.
- Water by tray need, not a fixed daily rule.
- Drain standing water.
- Thin crowded cells.
- Record first true leaves.
- Begin nutrition at the crop-appropriate stage.
- Measure fertilizer concentration and volume.
- Check roots before deciding to pot on.
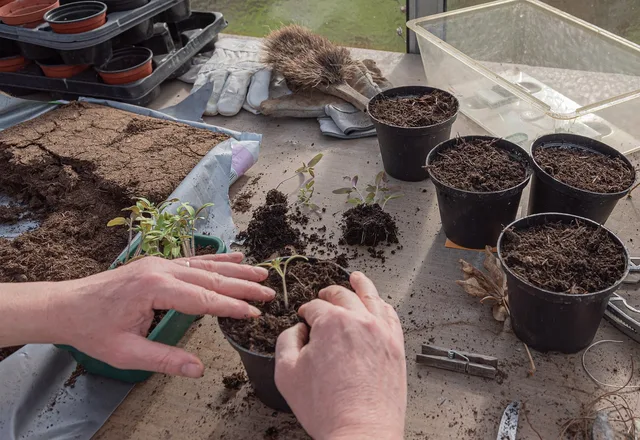
Potting on
- Confirm the field delay or crop size justifies the work.
- Prepare clean containers and suitable medium.
- Water before handling if needed for plug integrity.
- Lift seedlings without crushing stems.
- Plant at the crop's correct depth.
- Label the new container with the original lot code.
- Return plants to suitable light and temperature.
- Update peak-space calculations.
Hardening and field handoff
- Check the forecast and soil condition.
- Begin with protected outdoor exposure.
- Increase light, wind, and duration gradually.
- Avoid severe wilting and temperature injury.
- Confirm field irrigation works before delivery.
- Count plants ready, rejected, and held.
- Transport without crushing or drying plugs.
- Water after planting as required.
- Record field survival at the set interval.
Closeout record
- Seeds sown.
- Cells emerged.
- Plants ready on date.
- Plants set in field.
- Survivors.
- Nursery hours and direct cost.
- First and last harvest.
- Marketable stems from the lot.
- Keep, adjust, or replace decision.
Common questions
What if seed germination is lower than the packet states?
Review storage, test date, temperature, moisture, depth, light requirement, and counting method. Preserve the lot and records before contacting the supplier.
Should all trays be bottom-watered?
No. Bottom watering keeps foliage dry and wets the root zone evenly, but trays left standing in water stay saturated, which invites fungus gnats and damping-off. Drain trays after each watering, and match the method to the crop and the bench setup.
When should seedlings be potted on?
When root space or a field delay justifies it and the added bench capacity and labor exist. Do not pot on merely because a calendar says so.
How many replacement plants should be grown?
Size the reserve from your own germination test, the crop's historic field loss, seed cost, and spare bench capacity. A planned reserve is better than an arbitrary double sowing.