Guides
Part of 6 pointers on cut flower pest that hold up
How to scout a cut flower planting for pests and disease early
Scout cut flowers for pests and diseases with a mapped route, plant inspections, traps, symptom records, samples, action points, and follow-up checks.
What to take away
- Divide production into named blocks and follow the same route at each inspection.
- Inspect whole plants, growing tips, flowers, leaf undersides, stems, crowns, and roots when indicated.
- Use traps to track movement and trends, not as a substitute for crop inspection.
- Label samples and photographs with crop, cultivar, bed, date, and symptom pattern.
- Recheck marked plants after any action so the result can be measured.
Scouting works when observations can be compared over time. A walk through the field that produces no locations, counts, or crop details is a memory aid, not a monitoring system. The procedure below creates a repeatable record without turning every inspection into a full farm census. The University of Vermont's greenhouse IPM program describes scouting as a routine, systematic process whose records feed treatment thresholds and later checks of whether an action worked.
Choose one trained lead scout and a backup. Set a regular day and time, then add short checks when weather, incoming stock, or an active outbreak raises risk. Avoid inspecting only the most convenient beds. Edges, low spots, doors, vents, propagation areas, and recently received plants often deserve extra attention.
1. Map the scouting units
Give every greenhouse bay, tunnel, field block, and propagation area a stable name. Mark crop, cultivar, planting date, and bed length. Add incoming-stock isolation, cull areas, compost, hedgerows, and nearby crops that may affect pest movement.
Break large blocks into manageable sections. A count from "the zinnia field" cannot show whether pressure is at one edge or throughout the planting. Use row numbers, posts, flags, or map coordinates that another worker can find.
2. Prepare a small kit
Carry only tools that will be used:
- 10x hand lens;
- white card or tray for tapping flowers and foliage;
- clear vials or sealable bags;
- permanent marker and sample labels;
- flagging tape in two or three defined colors;
- phone or camera with a scale card;
- disposable gloves and disinfectant where cross-contamination is possible;
- current map and record sheet; and
- separate bags for roots and aboveground tissue.
Clean tools between suspect plants when the problem could move on hands or equipment. Do not carry a wet diseased sample uncovered through healthy production.
3. Look at the crop pattern first
Pause at the end of each block. Compare height, color, flowering, density, and wilt across the whole planting. Patterns narrow the possibilities.
| Pattern | Questions to ask |
|---|---|
| one plant | damaged root, localized infection, injury, or contaminated transplant? |
| expanding patch | drainage, contagious disease, soil condition, or irrigation distribution? |
| field edge | incoming insects, drift, wind, road dust, or neighboring vegetation? |
| straight line | irrigation, fertilizer, equipment, planting lot, or spray overlap? |
| random across cultivars | mobile pest, weather event, or shared handling? |
Photograph the pattern before taking close views. A sharp image of one spot cannot show distribution.
4. Inspect representative plants
Select plants from the edge and interior, plus normal and affected areas. Check the whole plant before touching it. Then work from flowers and growing tips to leaf undersides, stems, crowns, and the root zone when symptoms call for it.
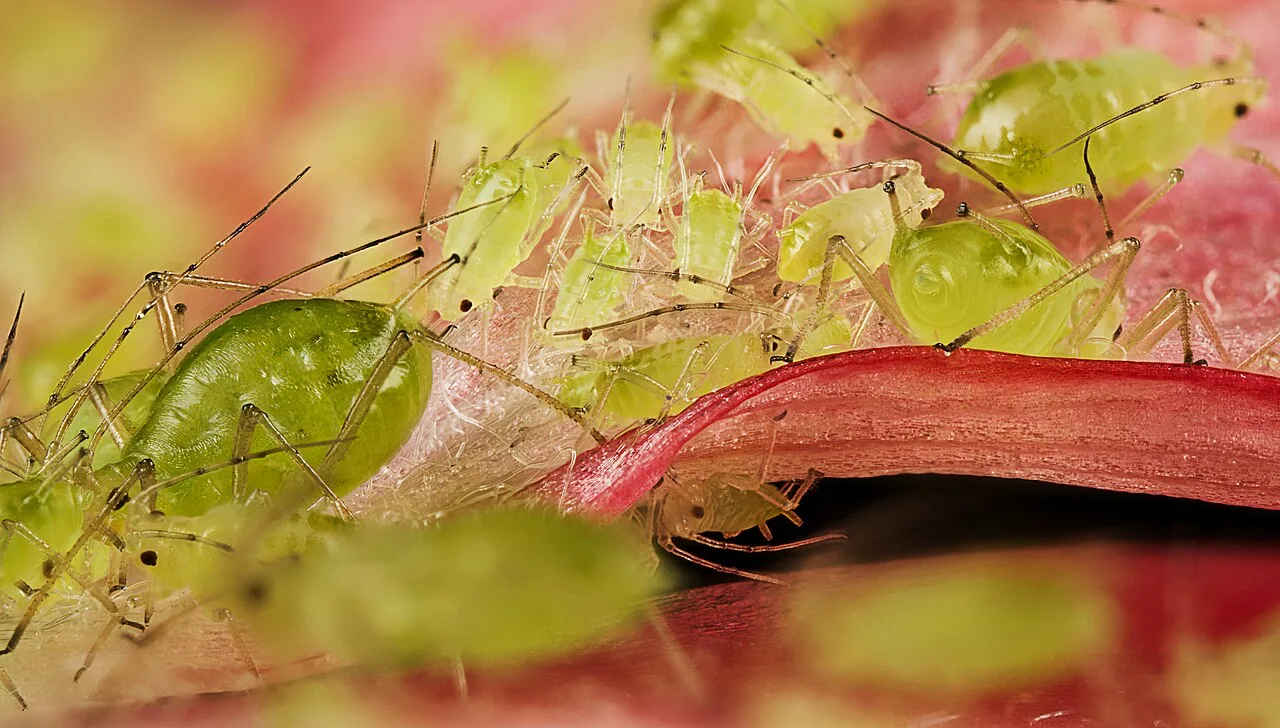
Tap blooms and tender growth over white material to expose thrips, mites, and other small insects. Look for cast skins, eggs, honeydew, frass, webbing, feeding scars, mines, and distorted tissue. For disease, record lesion shape, color, margin, surface growth, vascular discoloration, root condition, and whether tissue is wet, dry, firm, or soft.
UMass Extension's commercial scouting procedure recommends a hand lens, sticky cards, maps, flags, records, and laboratory support. It also advises placing greenhouse cards consistently and replacing them on a regular schedule so counts show trends. Keep card density and placement stable within each monitoring unit.
5. Count in a consistent way
Define the unit before counting. Examples include aphids per five growing tips, thrips per ten tapped flowers, mites per selected lower leaf, percentage of plants with new lesions, or adults per sticky card per seven days.
Record:
- zero when nothing is found;
- exact count up to a stated cap;
- life stage when recognizable;
- beneficial organisms separately;
- symptom severity with a short fixed scale; and
- the sampled number of plants or plant parts.
Do not change from five stems to twenty stems without recording the denominator. Raw totals cannot be compared when effort changes.
6. Flag, sample, and protect the evidence
Flag hot spots and a few untreated comparison plants. Give each sample a unique code. A disease submission should include a representative transition between healthy and affected tissue, not only dead material. Keep roots and soil from contaminating foliage in transit.
Photograph the label in the same frame as the sample. Record irrigation, recent sprays, fertilizer, weather, source lot, first symptom date, and percentage affected. Ask the diagnostic laboratory how it wants material packed and shipped.
7. Make and document the decision
Compare the finding with the farm's crop-specific action point. The response may be continued observation, removal, sanitation, irrigation correction, exclusion, biological control, a labeled pesticide, or laboratory diagnosis. Record why the action was chosen and who approved it.
8. Return after the action
Set the follow-up date when the action is assigned. Recount the same unit, inspect marked plants, and note new damage. If the count did not change, question identification, coverage, timing, life stage, weather, product compatibility, or resistance. Do not simply repeat an ineffective action.
Common questions
How many plants should I inspect?
There is no universal number for all farms. Define a consistent sample that covers edges, interiors, normal areas, and known hot spots, then increase effort when risk rises.
Can phone photographs replace samples?
Sometimes they support a preliminary opinion, but many insects and diseases require a specimen or laboratory test. Capture the crop pattern, whole plant, and close symptom view.
What does a sticky card miss?
It can miss nonflying stages, insects that remain inside flowers, root pests, and disease. Pair trap counts with direct plant inspection.
Should the scout recommend a pesticide?
The scout should document the finding and action point. A qualified decision-maker must confirm identification, crop label, legal requirements, and operational fit before application.