Guides
How to overwinter ranunculus corms for early spring cut flowers
Overwinter ranunculus corms in zones 6-8: lift, dry, store cool, or fall plant under cover. Here is the sequence, squeeze test, and rot recovery.
What to take away
- In USDA zones 6-8, ranunculus corms survive winter two ways: lift and store dry, or plant in fall under low cover.
- The storage window runs from lifting in late June to replanting in late September or October.
- A firm corm that snaps clean is ready. A soft one that dents under thumb pressure is not.
- Wet storage above roughly 60 percent humidity is the failure most growers meet, and it stays hidden until planting.
- Sorting corms by size before storage pays off at cutting time, because small corms flower late and short.
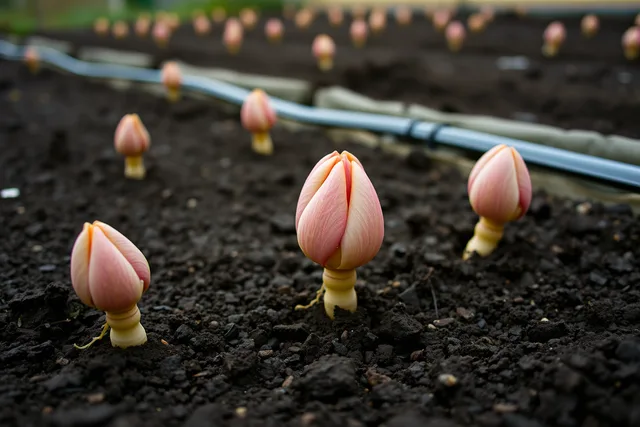
Ranunculus asiaticus grows from a clawed corm, not a true bulb, and that changes how you treat it. The corm has no papery tunic to hold moisture in, so it dries fast in open air and rots fast in damp air. Ranunculus corms can be stored dry and cool during dormancy, which is the whole basis of the method below.
What you need before starting
You need a harvest basket or shallow tray, a drying screen, mesh onion bags or paper bags, a cool room, and a thermometer plus a hygrometer. A cheap digital pair costs about $20 to $30 at a hardware store.
You also need labels. Corms of different sizes and varieties look alike once dry, and a mixed bag in spring means uneven stems. Write the variety and lift date on every bag.
The sequence
- Stop watering two weeks before you lift. Let the foliage yellow and collapse on its own. Green foliage lifted early will not have finished filling the corm.
- Lift with a digging fork, working 8 to 10 inches out from the plant so you do not spear the corms. Shake soil free by hand rather than washing.
- Cure the corms on a screen in a shaded, airy spot for 5 to 7 days. They should feel dry to the touch but not brittle.
- Sort by size into three grades: large, medium, small. Large corms flower first and heaviest, and they are the ones worth fall planting.
- Bag the grades separately in mesh or paper. Never seal them in plastic, because trapped moisture starts rot within days.
- Store at 50 to 55 F and 40 to 50 percent relative humidity. A basement corner away from a furnace or a spare refrigerator both work.
- Inspect every three to four weeks. Pull any corm that has gone soft, and discard it before it spreads.
Where judgement replaces the recipe
Storage temperature is a range, not a number. Below about 45 F the corms can start to break dormancy early and sprout in the bag. Above 60 F they burn through reserves and shrink. If your basement runs warm, a refrigerator set to its warmest setting is the safer bet.
Fall planting under cover suits growers who would rather not lift at all. Season extension techniques such as row covers, low tunnels, and cold frames hold soil above the hard freeze that kills corms in zone 6.
Plant in October, cover before the first hard frost, and vent on sunny days above 45 F. Zone 8 often does not need this; a plain straw mulch will do.
How to tell it is right
Use the squeeze test on a sample of five corms each month. A sound corm is firm, heavy for its size, and snaps with a clean sound when you bend it. A failing corm dents like a grape and smells sour.
At planting time, cut one corm open. Healthy tissue is cream to pale yellow and even. Brown streaks through the center mean the corm is spent, and it will not push a marketable stem.
Fixing it when it is not
Soft rot is the common failure, and it usually traces back to corms bagged before they were fully cured. Pull the affected corms, spread the rest on a screen in moving air for two days, and rebag in fresh mesh. Do not wash them, because water spreads the bacteria between corms.
If the whole lot has gone soft, buy fresh corms and change one variable: cure longer, or store cooler and drier.
Market growers should read how USDA hardiness zones and first-frost dates set a US cut flower calendar before setting a fall planting date. In zone 6, a two-week error costs the crop.
A worked example for zone 6
A grower in central Illinois lifts 400 corms on June 25, cures them six days on a garage screen, and stores them in mesh bags at 52 F.
In October she plants the large grade under a low tunnel and holds the medium grade for a spring hoophouse crop. She loses roughly 5 percent to rot over winter, normal for dry storage done well.
That split planting is worth planning against your sales channel. If you sell to florists who want long stems in April, the tunnel crop carries the premium, and the reasoning is set out in what New York and Miami wholesale florists expect from cut flower growers.
Common questions
Can I leave corms in the ground in zone 6? Usually not. Soil below about 25 F damages them, and zone 6 winters reach that depth in most years. Lift them, or plant under a low tunnel and accept some loss.
How long can corms stay in dry storage? Four to five months is comfortable. Beyond six months, reserves drop and stems come thin, so replant by late October in most of zones 6-8.
Do I need to soak corms before planting? Yes, a two to four hour soak in room-temperature water before planting rehydrates them. Skip it and emergence stretches out over three weeks instead of one.
What if corms sprout in the bag in January? Plant them in pots under cover and hold them cool. They will not survive another two months of dry storage once growth starts. A quick check of 6 pointers on cut flower pest that hold up is worth the ten minutes before those pots go into a house.