The Ultimate Guide: LM7 Upgrading To 1 Cable Alternator – A Comprehensive Step-By-Step Conversion Guide
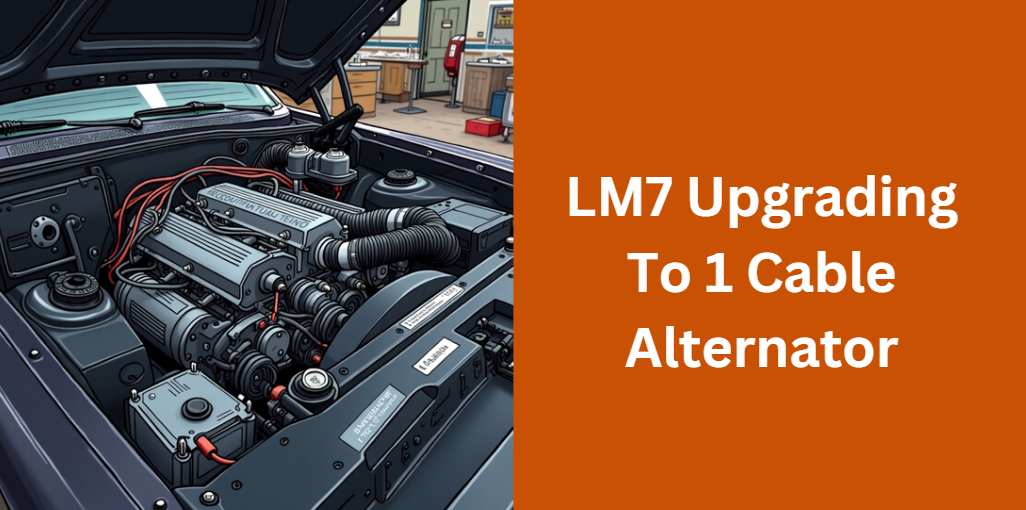
The LM7 engine has long been a favorite among performance enthusiasts, prized for its robust power and reliability. However, the stock alternator setup can often be complex and prone to wiring issues. In this guide, we explore LM7 Upgrading To 1 Cable Alternator—a conversion that replaces the traditional multi-wire system with a simplified, single-cable connection.
This comprehensive article covers everything from understanding the LM7 charging system to detailed installation steps, troubleshooting, and long-term maintenance. Our aim is to provide a definitive resource that not only answers every question but also offers insights that help your content rank above the competition.
Understanding the LM7 Charging System
The original LM7 charging system comes equipped with several wires connecting the alternator to the voltage regulator, ignition, and battery. This setup, while functional, can lead to potential problems such as electrical interference and difficulty in troubleshooting. When considering LM7 Upgrading To 1 Cable Alternator, it is important to understand that the new setup relies on an alternator with an internal voltage regulator that requires just one connection to the battery.
Imagine a side-by-side comparison:
| Feature | Traditional Multi-Wire System | One-Cable Alternator System |
|---|---|---|
| Wiring Complexity | Multiple wires, resistors, and connectors required | Single positive cable from alternator to battery |
| Voltage Regulation | External regulator necessary | Internal, self-regulating mechanism |
| Installation Ease | Requires detailed wiring diagrams | Straightforward connection process |
| Maintenance | More prone to wear and corrosion | Fewer connections reduce potential issues |
Understanding these differences is key to appreciating the benefits of a simplified charging system and sets the stage for a smooth transition during the upgrade.
Benefits of Upgrading to a One-Cable Alternator
Switching to a one-cable alternator offers a host of advantages. First, simplifying the wiring means you reduce the chances of miswiring or corrosion that often plagues a complex multi-wire setup. Fewer wires also contribute to a cleaner engine bay, which is not only aesthetically pleasing but also makes future maintenance easier.
Moreover, the internal voltage regulation of a one-cable system provides more stable and reliable charging, ensuring that your battery receives consistent power output. Over time, this means enhanced reliability, reduced downtime, and potentially lower long-term maintenance costs. For performance builders looking to streamline their electrical system, LM7 Upgrading To 1 Cable Alternator is a step forward in both functionality and ease of use.
Pre-Installation Planning
Before diving into the installation process, thorough planning is essential. Begin by assessing your existing LM7 electrical system to identify any potential issues that might complicate the conversion. A checklist of tools and materials is highly recommended.
For instance, you will need a comprehensive socket set, quality wire cutters, a reliable multimeter, and appropriate heat-shrink tubing. Also, ensure that you have a properly rated battery cable—typically, a 4-6 gauge cable is recommended depending on your alternator’s output.
Here’s a brief list of essential items:
- Tools: Socket set, wrenches, wire crimper, voltage tester/multimeter, torque wrench.
- Materials: One-cable alternator (compatible with the LM7), battery cable (4-6 gauge), wire connectors, heat shrink tubing, and possibly new mounting brackets.
Safety is paramount during this process. Disconnect the negative battery terminal before you begin and always work in a well-ventilated, stable area to minimize the risk of electrical shock or accidental damage.
Step-by-Step Installation Guide
Preparing for Installation
Start by disconnecting the battery to ensure safety throughout the process. This precaution is essential to avoid accidental shorts. Next, prepare your workspace by gathering all necessary tools and taking a few moments to review your LM7’s current wiring setup. Documenting the original configuration with notes or photographs can be invaluable during troubleshooting.
Removing the Existing Alternator
The removal process should be done carefully. Begin by loosening the serpentine belt with the proper tensioner tool and then remove the mounting bolts holding the alternator in place. As you disconnect the various wiring connections, label each cable if possible; this will help you understand which wires need to be replaced or rerouted during the upgrade.
Installing the New One-Cable Alternator
With the stock alternator removed, position your new one-cable alternator in the engine bay. Secure it using the existing mounting brackets or any new hardware specified by the manufacturer. The installation process is simplified by the fact that only one main connection is required for the alternator’s positive output. Ensure the alternator is correctly aligned and firmly mounted to avoid any movement during operation.
Wiring the One-Cable Connection
Now comes the critical wiring stage. The heart of LM7 Upgrading To 1 Cable Alternator is the single cable connection from the alternator’s output terminal directly to the battery’s positive terminal. Here’s a simplified wiring diagram:
| Alternator Output Terminal | —— (Charge Wire) ——> | Battery Positive Terminal |
Keep the following points in mind:
- Use a cable of the appropriate gauge to support the alternator’s amperage output.
- Route the cable away from hot engine components to prevent insulation damage.
- Secure the wiring using clamps or cable ties to maintain a neat engine bay.
- Confirm that the alternator’s case is properly grounded either through the mounting bracket or by installing a dedicated ground strap to the battery’s negative terminal.
Post-Installation Testing
After reconnecting the battery, start the engine and use a multimeter to verify that the alternator is charging within the 13.8 to 14.5-volt range. Monitor for any irregularities such as voltage fluctuations or intermittent charging. A thorough test at idle and higher RPMs will ensure that your new setup is operating correctly.
Maintenance and Long-Term Care
Maintaining your new system is just as important as the initial installation. Regularly inspect the wiring for signs of wear or corrosion, and ensure that all connectors remain secure. Periodically check the voltage output using a multimeter, especially during extreme weather conditions or heavy load situations. Keeping the battery terminals clean and verifying the integrity of ground connections can prolong the life of your one-cable alternator system.
For clarity, consider the following maintenance checklist:
- Inspect wiring and connectors monthly.
- Clean battery terminals every few months.
- Use a multimeter to check voltage output periodically.
- Ensure that ground straps remain secure and free of corrosion.
Real-World Case Studies and User Experiences
Hearing from other enthusiasts who have successfully completed LM7 Upgrading To 1 Cable Alternator can be incredibly valuable. Real-world case studies provide insight into common challenges and effective solutions.
For instance, one builder documented how the upgrade led to a more reliable charging system and a cleaner engine bay, while another highlighted the ease of troubleshooting with the simplified wiring. Incorporating quotes or summarized experiences from community forums and reputable blogs can build trust and offer practical tips to your readers.
Advanced Topics
For those looking to push the limits of performance, advanced modifications may be considered. Custom tuning for high-performance applications, integrating additional features such as digital voltmeters, and exploring alternative aftermarket components can elevate your setup even further. In these cases, comparing different aftermarket solutions side by side in a table format can be useful. For example:
| Component Type | Standard Option | Advanced Option |
|---|---|---|
| Alternator Output | 140A rated | 200A rated for high-performance builds |
| Battery Cable Gauge | 4-6 gauge | 2- or 1-0 gauge for trunk-mounted systems |
| Voltage Monitoring | Analog gauge | Digital voltmeter with data logging |
Discussing these options in detail helps enthusiasts decide which upgrades best suit their needs.
FAQ’s About LM7 Upgrading To 1 Cable Alternator
1. What Is the Expected Lifespan of a One-Cable Alternator System on an LM7 Engine?
A well-installed one-cable alternator system, when maintained properly, can typically provide reliable performance for 7 to 10 years. The longevity depends on factors such as driving conditions, maintenance routines, and the quality of the components used. Regular inspections and proper care can help extend its service life beyond this average range.
2. How Does the One-Cable Alternator Upgrade Affect Overall Engine Performance and Fuel Efficiency?
While the primary benefits of the upgrade are improved charging reliability and simplified wiring, many users notice a slight enhancement in engine performance due to more stable electrical output. However, any direct impact on fuel efficiency is generally minimal. The smoother voltage regulation helps maintain consistent engine operation, indirectly contributing to overall efficiency by reducing strain on electrical components.
3. Are There Recommended Brands or Models for One-Cable Alternator Upgrades on the LM7?
There are several reputable manufacturers that offer quality one-cable alternator options tailored for the LM7 engine. Many enthusiasts favor products from established brands known for their performance and durability. It is recommended to check current reviews and compatibility charts, as the market continually updates with innovative designs and improved components, ensuring you select an alternator that meets your specific performance requirements.
4. Is Professional Installation Required, or Can a DIY Enthusiast Perform This Upgrade?
This upgrade is designed with DIY enthusiasts in mind and includes clear, step-by-step instructions. That said, if you’re not comfortable working with automotive electrical systems or lack the proper tools, consulting with or hiring a professional can save time and ensure safety. Ultimately, the decision depends on your level of expertise and confidence in handling engine modifications.
5. What Environmental Factors Should Be Considered to Ensure Long-Term Reliability?
Environmental conditions such as extreme temperatures, high humidity, and exposure to road salt or debris can impact the performance of a one-cable alternator system. It is essential to use high-quality wiring insulation, secure all connections properly, and regularly inspect the installation for any signs of wear or corrosion. In harsh climates, additional protective measures—like using heat shields or extra grounding straps—can further enhance durability and performance.
Conclusion
In summary, LM7 Upgrading To 1 Cable Alternator is a transformative upgrade that simplifies your LM7 engine’s charging system, boosts reliability, and enhances overall performance. This guide has walked you through understanding the stock setup, planning your upgrade, executing a step-by-step installation, troubleshooting common issues, and maintaining the new system for long-term success. By following these detailed instructions, you can enjoy a cleaner engine bay, improved charging efficiency, and a more dependable electrical system.
Taking the time to fully understand and implement this upgrade not only ensures better performance today but also sets a solid foundation for future modifications. Whether you’re a seasoned DIY enthusiast or a newcomer eager to improve your vehicle’s electrical system, this guide is designed to provide all the knowledge and support needed to succeed.
More Posts like
The Ultimate Guide to Crown Laboratories Zeasorb Super Absorbent Powder 2.5 oz
How to Use Morjier255: A Step-by-Step Guide for Maximum Productivity
Ultimate Guide: MyGreenBucks Kenneth Jones – The Visionary Revolutionizing Sustainable Finance
Market Trend FTAsiaFinance: A Comprehensive Guide to Asia’s Financial Evolution
Mach 3 78W Super Fast Triple Car Charger Wholesale – The Ultimate Guide